A practical, beginner-friendly guide to setting up a gaming PC for VR. Covers VR-ready hardware, SteamVR and OpenXR setup, wired and wireless Meta Quest Link, and the performance settings that deliver smooth, low-latency virtual reality.
Stepping into virtual reality for the first time is thrilling, but the setup can feel intimidating. Which GPU do you need? Should you connect with a cable or Wi-Fi? Why does everything stutter? These questions stop many people before they ever put on a headset.
This guide walks you through the entire process of building a smooth, reliable VR gaming PC setup. You’ll learn what hardware matters, how to install the right software, how to connect your headset, and how to tune performance for crisp, comfortable play. By the end, you’ll have a working PCVR system and the knowledge to fix common problems.
Key Takeaways
- A VR-ready GPU is the single most important component for smooth performance.
- You need SteamVR and your headset’s runtime (like Meta Horizon Link) installed and updated.
- Wired Link cables deliver the most stable, low-latency VR; Wi-Fi 6 Air Link is the best wireless option.
- 16GB of RAM minimum, with 32GB recommended for demanding titles.
- Performance settings like motion smoothing keep frame rates comfortable when your hardware is pushed.
VR is far more demanding than flat-screen gaming. Your computer renders two images at once—one per eye—at high refresh rates, often 90Hz or higher. Drop below that target and you’ll feel it instantly as stutter, lag, or even nausea.
That’s why a careful PCVR setup pays off. Good hardware plus correct software settings means stable frame rates, sharp visuals, and comfortable sessions. Cutting corners leads to motion sickness and frustration. The goal throughout this guide is simple: hit and hold your headset’s target frame rate.
Mini takeaway: VR doubles the rendering work, so smooth performance depends on both hardware and tuning.
Before installing anything, confirm your PC can handle VR. Here are the core components that matter most.
Your VR-ready GPU does the heavy lifting. According to Steam Support’s Steam Link requirements for Meta, HTC and PICO headsets, the practical minimum is an NVIDIA GTX 970 or AMD RX 570, with an RTX 2070 or better recommended for a good experience.
For modern titles, aim higher. A current mid-range or better card gives you the headroom to run demanding games at full resolution without constant stutter.
The CPU handles game logic, physics, and tracking data. A modern multi-core processor—think a recent Intel Core i5/i7 or AMD Ryzen 5/7—keeps VR running smoothly. The GPU still matters more, but a weak CPU can bottleneck tracking and frame timing.
Mini takeaway: Prioritize a strong GPU, then back it with a modern CPU, 16GB+ RAM, and fast storage.
A clean software foundation prevents headaches later. Before connecting your headset:
NVIDIA users benefit from VR-focused rendering technologies. The NVIDIA VRWorks suite powers features like Variable Rate Shading and reduced-latency Direct Mode that headset and game developers use to boost performance and image quality.
Mini takeaway: Updated drivers and Windows are free performance—do this before anything else.
Most PCVR setups rely on two software layers working together.
SteamVR is the runtime that powers a huge library of VR games and acts as a hub for many headsets. To set it up:
This SteamVR setup is the backbone for titles you buy on Steam, regardless of which headset you own.
Each headset brand has its own companion software:
Install the runtime that matches your headset, then sign in and let it update fully.
OpenXR is the open industry standard that lets one game work across many headsets without separate versions. Maintained by the Khronos Group, the OpenXR specification reduces fragmentation so developers build once and players benefit everywhere.
For most users, OpenXR setup is automatic—your runtime registers itself as the active OpenXR provider. You rarely need to touch it, but knowing it exists helps when a game asks which runtime to use.
Mini takeaway: Install SteamVR plus your headset’s runtime; OpenXR usually configures itself behind the scenes.
How you connect shapes your entire experience. Let’s compare the main options, then walk through setup.
Method | Best For | Latency | Setup Effort | Requirements |
|---|---|---|---|---|
USB-C Link Cable | Maximum stability | Lowest | Low | USB 3.2 cable, free USB 3 port |
Wi-Fi 6 Air Link | Wireless freedom | Low–moderate | Moderate | Wi-Fi 6/6E router, strong signal |
Steam Link (wireless) | Streaming Steam games | Moderate | Low | 5GHz Wi-Fi 5 minimum |
DisplayPort (PC headsets) | Tethered PC-native headsets | Lowest | Low | DisplayPort + USB |
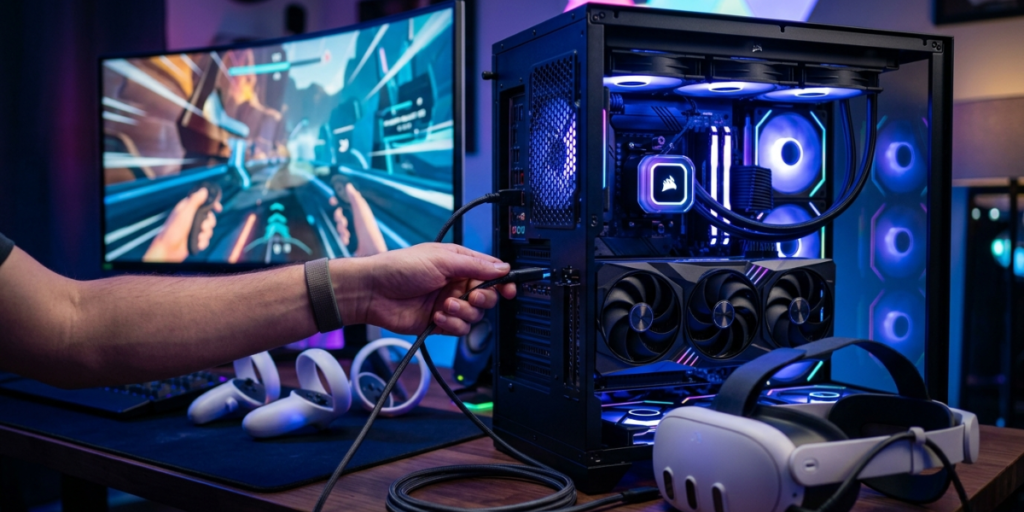
A wired connection is the gold standard for low latency VR. For Meta Quest, the official Meta Horizon Link and Air Link setup guide recommends a USB-C 3.2 cable rated for at least 5 Gbps. To connect:
That’s it—you’re now running PCVR with the most reliable connection available.
Prefer to cut the cord? Wi-Fi 6 Air Link gives you wireless freedom with low latency when your network is strong. Following Meta’s guide:
For the best wireless results, position your PC near the router (ideally wired to it via Ethernet) and play in the same room.
Mini takeaway: Use a quality USB-C cable for rock-solid play, or Wi-Fi 6 Air Link when you want freedom of movement.
Software and connections are only half the picture—your physical space matters too.
A well-prepared space prevents accidents and keeps tracking accurate.
Reader checkpoint: Can you take two full steps in any direction without hitting something? If not, clear more room.
Now optimize for smooth, comfortable play. These VR performance settings make the difference between magical and miserable.
In SteamVR or your headset app, find the render resolution slider. Start at the default, then adjust:
Match your refresh rate (72Hz, 90Hz, etc.) to what your hardware can sustain.
Motion smoothing (NVIDIA and AMD both support similar features) helps when your GPU can’t quite hit the target frame rate. It intelligently generates intermediate frames so motion stays fluid instead of juddery. In SteamVR, you’ll find this under video settings. Leave it on auto for most setups.
VR wants your full system. Before playing:
Launch a familiar game and watch for stutter. Use SteamVR’s frame timing display to spot dropped frames, then lower settings until performance is consistently smooth.
Mini takeaway: Aim for a steady frame rate first, then raise visual quality only if headroom allows.
Save yourself frustration by sidestepping these traps:
Avoid these and your first sessions will go far more smoothly.
At a baseline, you need a VR-ready GPU (around an NVIDIA GTX 970 or AMD RX 570), a modern multi-core CPU, 16GB of RAM, Windows 10 or newer, and a free USB 3.0 port. For a comfortable experience with current games, an RTX 2070-class card or better and 32GB of RAM are recommended. Exact needs vary by game and headset resolution.
A wired USB-C Link cable offers the lowest latency and most consistent performance, making it ideal for fast-paced or competitive games. Wi-Fi 6 Air Link delivers low latency and freedom of movement when you have a strong 5GHz network. If stability is your priority, go wired; if you value mobility and have good Wi-Fi, Air Link is excellent.
Usually, yes. Your headset’s runtime (such as Meta Horizon Link) handles the connection between your PC and headset, while SteamVR runs the large library of Steam VR games. Many setups use both together, with OpenXR quietly managing compatibility so games launch on your active runtime.
Stutter often comes from settings, not raw power. Check that your GPU drivers are current, lower your render resolution, enable motion smoothing, and close background apps. For wireless play, confirm you’re on a 5GHz or Wi-Fi 6 network with a strong signal. Small adjustments usually restore smooth frame rates.
Setting up a gaming PC for VR comes down to four essentials: capable hardware, updated software, a stable connection, and smart performance tuning. Get those right and you’ll enjoy crisp visuals, low latency, and comfortable sessions from day one.
Your next step is simple. Confirm your GPU meets the requirements, install SteamVR and your headset’s runtime, choose a wired or Wi-Fi 6 connection, and dial in your settings. Then clear your space, set your boundary, and step into your first virtual world—your PC is ready for it.
Powered by Digital AI Tips – All rights reserved.